If you’re planning on following the steps of the ancient samurai by walking part of the Nakasendo Trail in Japan, you can use this 3-day itinerary to see some of the highlights.
The Nakasendo Trail, also known as the Samurai Trail, is a 500+ km route that connected Kyoto with Edo (now Tokyo) during the Edo Period. While you can walk the entire Nakasendo, the best-preserved parts are located in Gifu and Nagano Prefecture.
On a previous trip, we hired a car and stopped at some of the 69 post towns as we were short on time. However, after seeing how beautiful these towns were, I decided I wanted to walk part of it and see the trail in between – which is exactly what we did a few months later.
When walking part of the Nakasendo, we passed through historic towns, valleys, bamboo groves and rice fields. For three days, we got to enjoy a piece of old Japan and the beautiful Japanese countryside.
Below, I’ve broken down our three days on the Nakasendo, including the popular Magome-Tsumago route and the Torii Pass to Narai. Let’s take a look.
🏨 Stay: Booking.com
📱 Connectivity: Journey Japan eSIM | Wireless Japan Pocket WiFi
🚅 Transport: Individual Shinkansen Tickets | JR Passes | Airport Transfer
🍣 Experiences: Klook | GetYourGuide
📷 My Camera Gear: Fuji Film XT-5 | Sigma 18-50mm f2.8 | DJI Mini 4 Pro
🗾 Take me to a random hidden spot in Japan
☕ Support our free Japan guides by buying us a coffee! Thank you!
What is the Nakasendo Trail?
The Nakasendo trail (中山道) is an ancient route connecting Kyoto with Edo (now Tokyo) created in the Edo Period. Nakasendo translates to “inner mountain road”, as the nearly 540 km (340 miles) long route takes you through the mountains of Kiso Valley.
The road was mainly used by samurai, merchants, monks and feudal lords. Across the route, there are 69 post-towns, or shukuba machi (宿場町), where travellers were able to rest, eat and get other supplies. Some of these post towns have been beautifully preserved, and make walking the Nakasendo a real treat.
To give a bit more background on the Nakasendo and the reason why so many people used to travel such a long way back in the Edo Period, you need to know a little bit about the Tokugawa shogunate. This was the shogunate that ruled Japan during the Edo Period.
As a way to control the feudal lords (daimyōs), the shogunate put a policy in places called the Sankin-kōtai. This policy meant that feudal lords had to spend some time in Edo every other year. As this cost a lot of time and money, it stopped them from gathering enough money, weapons and people to overthrow the shogunate.
The shogunate created five main highways, also known as the Gokaidō (五街道), connecting Edo with the rest of Japan. The Nakasendo was the primary route used, connecting Kyoto (the old capital) with Edo.
Nakasendo Trail Itinerary Overview & Map
As the full Nakasendo stretches over 500 km, I picked a few smaller parts to walk across three days. Some parts include taking a bus or train to get to the best parts of the route without having to walk too much every day. If you want to walk extra, you can skip the public transport.
Here is the route we walked across three days:
- Day 1: Nakatsugawa (bus) Magome (walk) Tsumago (walk or bus) Nagiso
- Day 2: Nagiso (walk) Nojiri (train) Kiso-Fukushima
- Day 3: Kiso-Fukushima (train) Yabuhara (walk) Narai-Juku (train) Matsumoto.
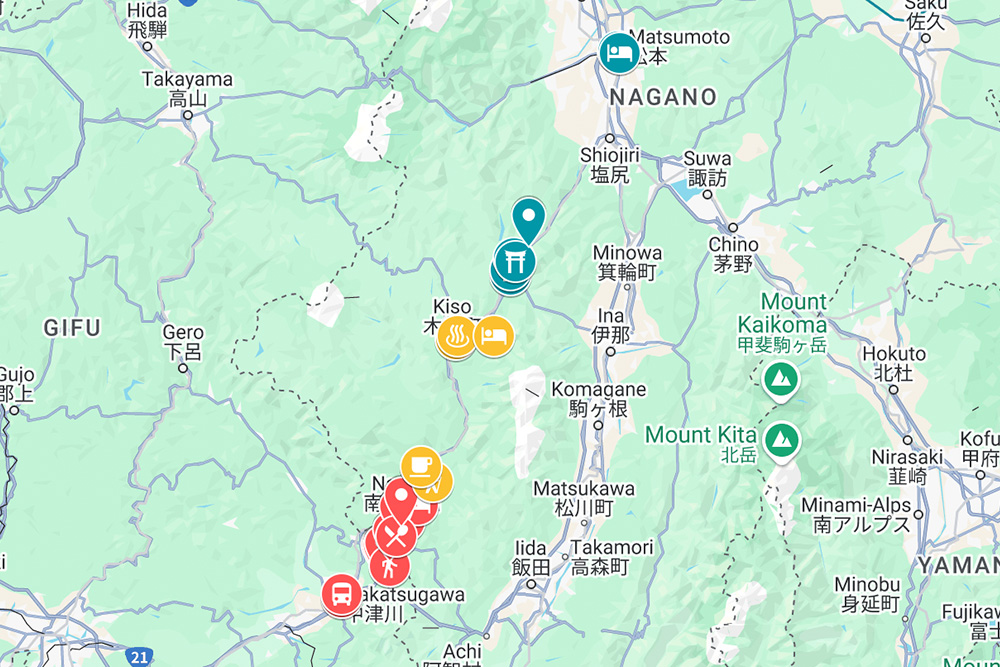
The route between Magome and Tsumago is probably the most popular part of the Nakasendo, as it’s incredibly beautiful and very easy to reach from Nagoya. If you only have one day to walk a part of the Nakasendo, this is often the route people choose. As this is the most popular part, it also gets a bit busy – so if you have extra time, I’d highly recommend adding a couple of days to your time on the Nakasendo.
The Torii Pass, between Yabuhara and Narai-Juku, is probably the second most popular part of the full route, but also a bit more difficult compared to the other two days in this itinerary. At 1,197 meters in elevation, the Torii Pass gives you some amazing views and takes you to Narai-juku, which is one of the best-preserved post towns along the entire route.
The full Nakasendo is a long trail, but there are train lines that follow a large part of it. So depending on how much you want to walk every day, it’s possible to shorten the days and take the train towards one of the next stops. We did this a couple of times to make sure we fit all the spots we wanted to visit in three days.
Most accommodations on the Nakasendo also offer pick-up and drop-offs at the nearest train station, so you don’t have to walk all the way. It requires a bit of planning, but it’s very doable. I’ve shared the accommodation we used a bit further down this guide.
Where to Stay on the Nakasendo
Accommodation on the Nakasendo is a bit more scattered and trickier to find than in big cities like Tokyo or Kyoto. However, it’s still very doable to book it yourself and save a ton of money (instead of going with an organised tour).
Below, I’ve listed the hotels/inns that we used on this Nakasendo itinerary. All are on the route, offer pick-up from the nearest station and have a public bath:
- Onn Nakatsugawa (Day 0): A few minutes walk from the train and bus stations, Onn Nakatsugawa is a beautiful hotel with onsite public baths, comfortable beds and right on the Nakasendo. A perfect place to stay the night before you start your walk.
- Hostel Yui-an in Nagiso (Day 1): This beautifully renovated farm made for an unforgettable stay; it was incredible! Even though it is called a “hostel”, it’s not quite the same. There are two guest rooms with one shared bathroom, so you’re only sharing with one other group of guests. You get your own room with a cosy futon. Dinner and breakfast can also be arranged. The owner will pick you up from Nagiso Station if preferred. Plus, as it’s located on the Nakasendo, you can walk straight from the hostel in the morning.
- Morino Hotel in Kiso-Fukushima (Day 2): A slightly order hotel, but for a very affordable price. Someone from the hotel will come to pick you up from Kiso Station and drop you off again in the morning at your preferred time. The ryokan-style rooms came with thick futons, and the on-site onsen was amazing after a long day of walking.
- Tabino Hotel Matsumoto (Day 3): As all accommodation in Narai was booked up, we decided to travel onwards to Matsumoto at the end of our last day on the Nakasendo. We’ve stayed at the Tabino Hotel in Matsumoto a few times now across multiple trips as we simply love it. It’s close to the train station and some of the rooms even come with a small kitchen and a washing machine. As we were planning to spend some time in Matsumoto afterwards, it worked out great!


Make sure you book as soon as possible, as there aren’t too many options for accommodation along the Nakasendo. If the hotels above are already booked up, the best thing to do is to use the booking.com map tool. That way, you can scan the map close to the end or starting point for the days you’re planning to walk and find a hotel nearby.
From research, I’ve noticed that a lot of accommodation in this area will offer a pick-up and drop-off at the nearest station. The majority also offers some kind of dinner and breakfast – and it’s highlighted if they don’t, so you can make sure you eat before getting picked up.
3-Day Nakasendo Trail Itinerary
The night before we started our walk on the Nakasendo, we stayed overnight in Nakatsugawa to make the most of our time there. From Nagoya, you can get the train to Nakatsugawa in just over an hour. Nakatsugawa is on the Nakasendo and also has frequent buses that can take you to Magome, which is the start of our first day.
We stayed at Onn Nakatsugawa, which I would highly recommend. The hotel is only a short walk from the train and bus stations, has comfortable rooms and an amazing public bath where you can relax before starting your walk.
The hotel also offers luggage transport services, which we used to send our suitcases to Matsumoto, where we ended our three days on the Nakasendo. That way, we only had to carry a small backpack with essentials for our walk.
Day 1: Magome – Tsumago
- Overview: Take the bus from Nakatsugawa to Magome. From Magome, walk to Tsumago (8km). From Tsumago, you can either take a bus to Nagiso Station or walk an extra 3.5 km to get to the station.
- Accommodation recommendation: Hostel Yui-an in Nagiso.
In the morning, we started at Nakatsugawa. As this town is also part of the Nakasendo, you can walk from here, but as we only had three days, we took the bus. The bus from Nakatsugawa to Magome costs ¥570 for adults (¥290 for children) and takes about 25 minutes.
The buses run quite often and you can find the updated schedule here. It’s not possible to pre-book tickets for this bus, so make sure you show up on time.
The route between Magome and Tsumago is the most popular part of the Nakasendo, so don’t be surprised if you see a lot of other hikers here. Luckily, it will be much quieter in the next two days. And despite the groups of hikers, the Magome–Tsumago trail is absolutely stunning. The 8km trail should take you around three hours.

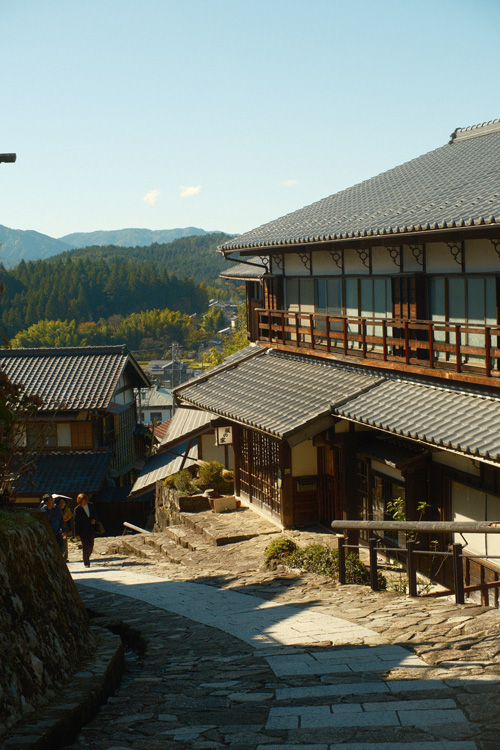
Once you get to Magome (馬籠), you’ll immediately see why the Nakasendo carries so much historical and cultural importance. The cobblestoned streets, the traditionally restored wooden buildings and the waterwheels on the side of the road make it feel like you’ve stepped back hundreds of years.
The bus will drop you off at the start of Magome, allowing you to walk uphill through the town’s main street. You’ll pass some small restaurants, cafes and shops – all in traditional wooden houses.

Magome is written with the kanji for “horse” and “basket”. According to the Gifu Prefecture website, the name comes from the fact that the hills were often too steep for horses to climb, which meant many travellers left their horses in Magome. And while the road through the town is indeed a bit steep, you don’t have to rush.
Before leaving Magome to start your walk to Tsumago, you can get a stamp card from the tourism board for a couple of hundred yen. You can get it stamped in Magome and Tsumago and serves as a certificate to show you’ve completed this part of the trial. It’s made with local hinoki cypress wood, making for a lovely souvenir.


Before leaving the Magome area, you’ll also pass the town’s old bulletin board. This large wooden board was used as a place to share official announcements from the Shogunate in the Edo Period. You can find similar boards in other post towns. You’ll have to continue walking to follow the route towards Tsumago, and you can get a lovely view from just after the bulletin board here.


The walk between Magome and Tsumago is incredibly beautiful. You’ll walk through lovely forests and old townscapes, past waterfalls and rivers, all on the ancient cobblestones. Halfway through the walk, make sure you stop at the Ichikokutochi Tateba Chaya.
This 250-year-old farmhouse has been serving as a rest stop for travellers of the Nakasendo Trail for centuries. Ran by Mr. Matsubara, the teahouse offers free tea and a rest place for people who walk the Magome–Tsumago route.
The building itself is beautifully kept and the hosts are so welcoming. There is even a large sign outside where you can write your country of origin on, as so many foreign visitors have come to this teahouse over the past years.


After the full 2-3 hour walk, you’ll arrive in Tsumago. I preferred the look and feel of Tsumago to Magome, as it felt even more traditional and less “touristy”.
Cars aren’t allowed to enter the town during the day and no power lines are in sight. The town also has some strict rules against selling or destroying any of the traditional properties in the town to maintain the Edo Period look and feel.
Both times we visited Tsumago (during our Nakansendo walk and our stop during the drive through Kiso Valley earlier that year), we stopped for lunch at Yamagiri Shokudo. This old-school restaurant offers delicious udon served with fresh mountain vegetables.


From Tsumago, you can take a bus to Nagiso Station, which costs ¥300 per person. It only takes about 10 minutes, as it only covers around 3.5 km. The bus schedule can be found here. If you have enough energy left, I highly recommend walking to Nagiso Station instead of taking the bus.
While the Magome–Tsumago route is incredibly beautiful, it was probably my least favourite part of the three days of hiking as it was so busy. As most people who only walk for one day will stop at Tsumago, the extra 3.5 km from Tsumago to Nagiso Station will add a lot of value.


Apart from a couple of local children walking home from school, we were pretty much the only people there. Plus, we got to stop at a lovely temple called Kabuto Kannon. The doors of the temple were slightly opened and inside laid a guest book where you could sign your name and country of origin.
From Nagiso Station, we were picked up by our host from Hostel Yui-an. He drove us to his beautifully renovated farmhouse where we stayed the night.
Accommodation: Hostel Yui-an
I wanted to give a bit of extra attention to this amazing place, as it blew me away. In the middle of the mountains of Kiso Valley, this 200-year-old farmhouse has been renovated into a cosy, welcoming inn. With incredible mountain views, a beautiful authentic interior and very welcoming hosts (Hiro and Rei), I can’t recommend this place enough.
Hostel doesn’t quite seem like the right word for it, it’s more like a unique inn with a ryokan feel. While it does have a shared bathroom, there is only room for two parties to stay at the farm, so you don’t have to share it with many people. We even had a private shower with our room, and all the bathrooms were very clean.

When we arrived, we were shown to our room and had some time to grab a quick shower before dinner was served. The futons were already prepared in our room, along with a small side heater to keep the room nice and toasty. The interior of the living room and bar area is incredible – there is so much to look at!
After dinner, my husband and I stayed around the bar to chat with the other couple that was saying in the farmhouse that night. We also tried the sake tasting for ¥500. Our host poured five cups of sake, all made in the Nagano Prefecture, and we got to learn more about the different tastes.


Breakfast was also great, filling us up for another walk ahead of us. We got to chat with Rei a bit more too, who showed us pictures of the renovation of the farmhouse. If we weren’t on a tight schedule walking the Nakasendo, I wish we could’ve stayed for a couple more nights.
As the host offers free pick-up and drop-off at Nagiso Station, it also works great when you’re following this Nakasendo itinerary. Even better yet, the hostel sits on the Nakasendo, so you can literally walk straight from it on your second day (like we did!).


Day 2: Nagiso – Nojiri
- Overview: From Hostel Yui-an, walk towards Nojiri-juku station through the Nenoue Pass (12.5 km), which takes around 4–5 hours. From there, take the train to Kiso-Fukushima, where you’ll stay the night.
- Accommodation recommendation: Morino Hotel in Kiso-Fukushima.
As Hostel Yui-an sits on the Nakasendo Trail, you can start walking straight away. Compared to the first day, the difference in the number of people was shocking. The entire day, we only came across two other hikers during our walk, along with a small group at Nojiri Station.


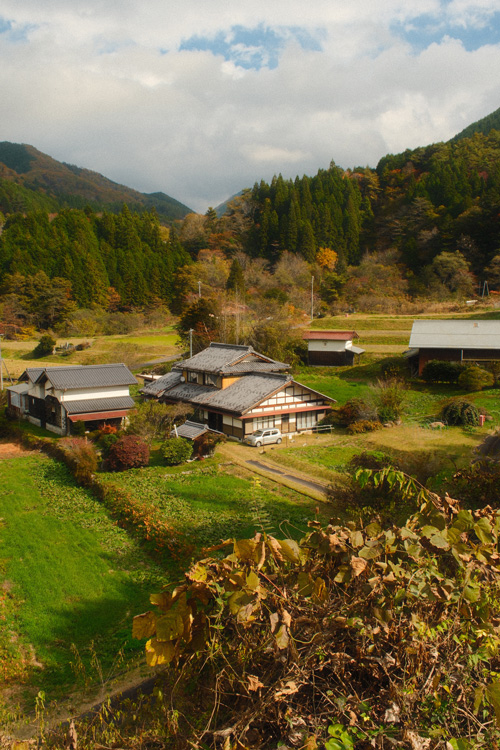
The walk from Nagiso to Nojiri takes you through dense forest with striking green moss, lush rice paddies and beautiful traditional houses in the Japanese countryside. We stopped by a couple of small temples and enjoyed the silence of the forest – it was so peaceful.
As there aren’t as many people on this trail, it’s worth keeping a bear bell attached to your bag. We came across many signs warning for bears, and even some larger bells scattered through the forest.


The walk did include some climbs and felt a bit more strenuous than the first day. It took us around 4.5 hours to complete the 12.5 km. In Nojiri, we had lunch at Coffee Katana before getting on the train towards Kiso-Fukushima. The train itself takes around 30 minutes, but it only leaves once every couple of hours, so it’s worth checking the train times before stopping somewhere for lunch.
Depending on how much time you have left once you arrive in Kiso-Fukushima, it’s worth having a little stroll around. Kiso is a quiet, sleepy town in the middle of the Kiso Valley, but has some lovely traditional streets to enjoy, along with a free foot onsen near the river.
Kiso-Fukushima is also famous for the rolling festival, and you can visit a small free museum dedicated to it. During the festival, a portable shrine is rolled over and over in the streets, following a local myth where two people were attacked and rolled a shrine to Kiso-Fukushima over 700 years ago!


As accommodation is scarce around these parts of the Kiso Valley, our hotel is a small car ride from the town. However, Morino Hotel offers free pick-up and drop-off services from the train station. The rooms have a traditional atmosphere (although slightly outdated, but very clean) with lovely thick futons. The on-site public bath was amazing – I slept amazingly after a long soak.
Day 3: Yabuhara – Narai-juku Through the Torii Pas
- Overview: From Morino Hotel, get dropped off at Kiso-Fukushima Station where you take the train to Yabuhara Station. From Yabuhara, walk to Narai-juku through the Torii Pass (8.5 km), which takes around 2.5–3 hours. After exploring Narai-juku, you can take the train towards Matsumoto, ending our Nakasendo itinerary.
- Accommodation recommendation: Tabino Hotel in Matsumoto.
On the third and last day of this Nakasendo itinerary, we walk the second-most popular part of the Nakasendo Trail. This is the Torii Pass (鳥居峠), which takes you from Yabuhara to Narai (奈良井). Parts of this 8.5 km route are quite steep and are considered a moderate hike. I definitely had to stop a few times to catch my breath.
We started the day by being dropped off at Kiso-Fukushima Station by one of the drivers of the hotel. From there, we took the train to Yabuhara Station. Again, it’s possible to walk from Kiso-Fukushima to Yabuhara, but as we only had three days on the Nakasendo, we decided to take the train. The train doesn’t run often, so make sure you check the train times beforehand!


From Yabuhara Station, we set off towards the start of the Torii Pass. Yabuhara is a charming little town, with a few shrines you can stop by (including 藪原神社, which has a beautiful red torii gate).
As with the rest of the Nakasendo Trail, signs in Japanese and English clearly show you which way to go. At every crossing, you’ll be directed the right way, making it very hard to get lost.

Following the signs out of Yabuhara town, you’ll slowly make your way to the start of the Torii Pass. The highest point of this pass sits at 1,197 meters in elevation, 320 of which you have to climb uphill during the first half of the hike. While a little challenging, it’s a very rewarding hike, taking you past some beautiful vistas and shrines along the way.
Ontake Jinja sits around the halfway point. The shrine has a striking white torii gate on top of a small hill. The torii looks out towards the trees behind it, it’s beautiful from the top. The walk downhill towards Narai is a lot easier and takes you through some lovely, dense forests.

Even though it was a bit tough in some parts as it was a bit steep, we managed to get to Narai around noon. This gave us more than enough time to explore the town and have some well-deserved lunch.
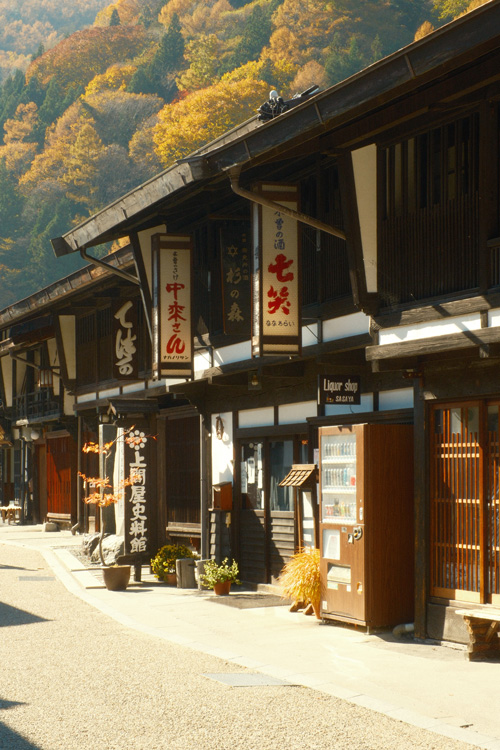
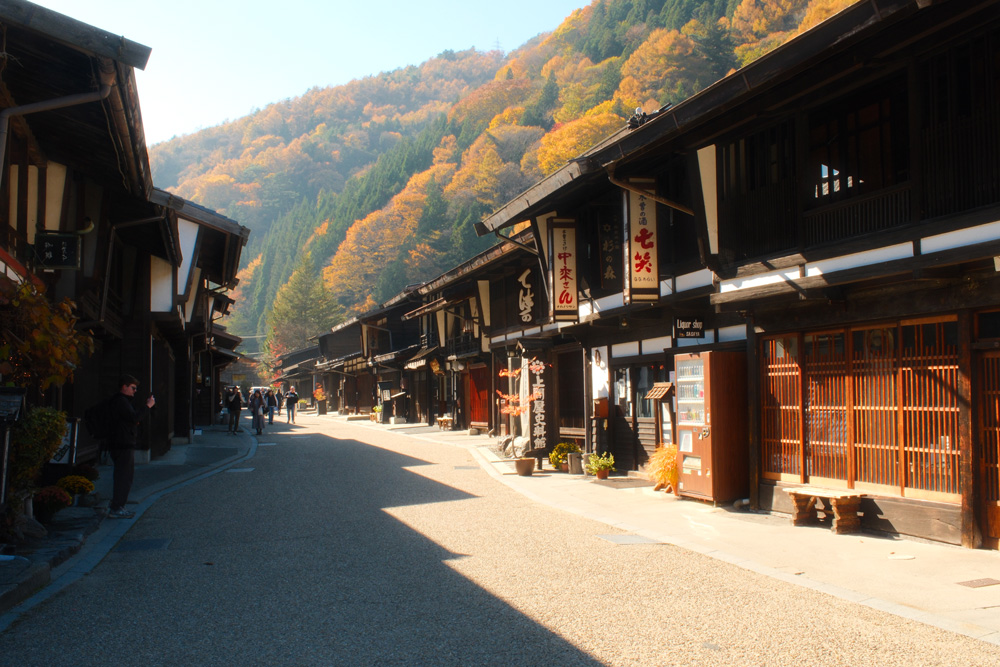
Out of the 69 post towns along the Nakasendo, Narai-juku was the wealthiest. In the past, it was referred to as “Narai of a Thousand Houses” as it was also one of the largest towns. It stretches across a few different roads, which is much larger than the other post-towns we visited over the last few days.


Narai is beautifully preserved, and you can easily spend a couple of hours wandering around. Despite having such a lovely authentic atmosphere, cars are allowed to drive here (in contrast to Tsumago) which sometimes ruins the illusion slightly.
From Narai-juku, we took the train to Matsumoto, which concluded our time on the Nakasendo. We would’ve loved to stay in Narai-juku for the night, but all the accommodation was booked up already.
If you do manage to get a ryokan in Narai-juku, you may want to leave a little bit later in the morning though, as the full hike through the Torii Pass doesn’t take too long – or add the walk from Kiso-Fukishima as part of that day instead of taking the train.
Best Time to Walk the Nakasendo Trail
As with most areas of Japan, the best time to visit the Nakasendo Trail is either during spring (March until May) or autumn (October to November). However, the trail is open all year round and can be enjoyed during all seasons.
I walked this Nakasendo Trail route in November and it seemed like the perfect time to do so. The weather was still great, with mild temperatures and no rain. It even got a bit too warm at some points, where I had to take off my jacket and continue walking in just my T-shirt. The autumn leaves were vibrant red, treating us to some of the most beautiful sights.
The first time I visited some of the post towns on the Nakasendo was in spring – when we rented a car and drove past Magome, Tsugamo and Narai. Despite it being busier than in November, it was beautiful to see the trees in bloom and the bright green fields.
What to Pack for the Nakasendo Trail
For this 3-day Nakasendo Trail itinerary, we used a luggage forwarding service to take our bigger suitcase from Nakatsugawa to Matsumoto. For the three days on the trail, we used our backpack and brought the following:
- Underwear and socks for 3 days
- Toiletries (deodorant, toothpaste, toothbrush, make-up, make-up remover, basic skincare, blister plasters)
- Small flannel
- Refillable bottle of water
- Some snacks
- Pyjamas
- Three clean t-shirts
- One fleece jumper
- One pair of hiking trousers
- Hiking shoes
- Some cash.
Conclusion – Is the Nakasendo Trail Worth Visiting?
The Nakasendo Trail can be an amazing addition to your time in Japan. It’s 100% worth visiting if you want to see more of rural Japan. The beautifully preserved towns and incredible landscapes, forests, mountains and rivers give you a real appreciation for the Japanese countryside.
If you’re planning to walk the Nakasendo, I would urge you to go for more than one day. So many people only walk the part between Magome and Tsumago trail as it’s easy to reach from Nagoya and only takes 2–3 hours.
However, despite being a beautiful part of the Nakasendo, it’s very busy and turned out to be my least favourite day on the trail due to the number of other hikers. Even walking from Tsumago to Nagiso on our first day was way more enjoyable for me, leaving the lines of people behind. The other two days on the Nakasendo were way less busy and were much more enjoyable!
If you’re looking for more destinations in Japan away from the Golden Route, you can use my randomiser link to take you to one of my articles about places in Japan you may not have heard of yet. It’s an easy and fun way to learn about new areas in Japan that may be perfect for your next trip!









Dear Nele,
Is it possible to do this trip in reverse? I was thinking of going from Tokyo up to Matsumoto/Kamikochi. What do you think.
Martin
Hi Martin! Definitely possible to do in reserve if that works better for you 🙂 The trains and busses run both ways, and it’s possible to walk the trail the other way too.
Wonderful details! Thank you so much for sharing ! It’s really helpful!
Thank you so much! It’s such a beautiful part of Japan, I hope more people walk a few days instead of just the first day 🙂
Hi Nele,
Thank you for the lovely sharing. Can I ask, at the end of the trip, how did you move from Matsumoto and where did you go from there? Also, my wife and I are thinking of walking the Nakasendo trail in late November/ early December, do you think that’s possible?
Thanks Alvin! We used the train from Narai-juku to get to Matsumoto (from there, we travelled onwards by bus to Takayama and then to Kanazawa – still working on these guides!). We were there mid-November which was amazing, so I’m sure late November/early December will still be fantastic! Hope you have a great time!
Hi Nele, thank you very much for this itinerary !
Do you think it’s safe for a female solo traveller ? And given the risk of encountering bears is it ok to do the trail alone ? Thank you for your answer 🙂
Hi! Japan is a very safe country, but I’ve never done any solo hiking around there so I find it very hard to comment on it 🙁 The first day would definitely be fine as there were a lot of other hikers, but I’m not sure how I would’ve felt on the more quiet days. There are some bear risks, but as long as you bring a little bell, you should be fine!
Hi Nele, thank you so much for this fabulous article – super helpful. I am thinking of doing this 3-day hike mid or late November 2026. I am a solo male traveller, and just wondering if the accommodation you recommend would be suitable, or should I look for alternatives? Also, is it easy to get back to Tokyo from the end point? Thank you!
Hi Andre, thank you so much! The accommodation would definitely be suitable for a solo traveller also 🙂 From Matsumoto, you can get a shinkansen back to Tokyo quite easily. Hope that helps!
Hi Nele, My partner and I are going to hike early October 2026 and I was wondering about the short bus and train rides in between the towns. I was hoping to walk out the door of the accommodation each day and start walking to the next town. We only have 4 days to hike and I’m wondering if we should start further up the trail to avoid the crowds. Also, can we walk in and book accommodation at the end of each day? Any must see places you encountered?
Hi Kirsty! Exciting plans! You could definitely start after Tsumago to avoid some of the crowds, but it is a lovely starting point. It’s totally up to you though 🙂 As for accommodation, I would really pre-book them, especially in October. There aren’t a lot of places that offer accommodation on the routes so it’s best to have at least your accommodation booked so you’re sure to have a bed for the night 🙂
Hi Nele
Thanks for such a comprehensive article on the Nakasendo walk, such great information.
My question is which company did you use to transfer your luggage? And was it expensive?We are thinking of transferring it from Kyoto to Matsumoto.
Also do you think will we see autumn leaves end of October?
Thanks
Hi Virginia, thank you for the kind words! Yes, we used luggage transfer from Nagoya to Matsumoto, which cost a few thousand yen per bag (totally worth it!) and then just bought a backpack for the walking days with some new underwear and clothes.
End of October may be a little early but it’s very hard to say!